Showing posts with label frugal luxuries. Show all posts

Saturday, August 20, 2016

Bunny Feeding Station

This post is photo heavy - forgive me. Or not. I'm ok either way.

I have pet bunnies! Did you know that? Sugar Cookie and Henry. They're both dwarf Holland Lops, Sugar Cookie is grayer and Henry is browner. They're freakin adorable. :) They're also messy as heck, and bunnies do tend to poop while they eat. To encourage them to poop in their litter box, I keep their food dish in their litter box. And Henry likes to dump their food dish. Daily. It drives me nuts. So today I decided to make a feeding station ATTACHED TO THE WALL. That bowl isn't going ANYWHERE.


I forgot to take during photos, so here are some elaborate after photos. Cuz I'm a bad blogger for not completely documenting this. There are three stations - water bottle, food bowl, and hay manger. My goal was to build it using things I already had (minus the new food bowl).


The water bottle has two parts, the top is a piece of wire attached to an eye and secured to a hook with a loop in the wire.


The lower part supports the weight of the bottle, so I wanted something a little sturdier. I took a curtain rod support and reshaped it with a hammer, It fell a little short so I put a thin board under it rather than try to find something else to support it with.


Next we have the food dish. That was easy to attach, the bowl base has two bolts coming off the back that go between cage bars, then secures to the cage with a metal strap and some nuts. The bolts, handily enough, were just 1/4" longer than my board was thick. So I drilled a couple of holes, put the bolts through, and secured it with the nuts.


Lastly, the hay manger. It's meant to hang from cage bars also, so I gave it some wire to hang from. I made a little loop in each end of the wire and screwed it to the board through the loop with some large headed screws.


Lastly, I screwed it to the wall at the right height over the litter box, added the food dish and water bottle, and filled it all up! Henry is modeling it, below. Isn't he just too freakin cute?


Thursday, July 21, 2016

DIY Green Smoothie "Powder"

Right - so this whole idea started because I have SO MUCH CHARD in the garden right now. Like,
trimming and laying out the chard for dehydrating
I'm *almost* sick of eating it. Almost. So I decided to start preserving it now - and rather than go with the traditional freezing of the chard, I decided to dehydrate it! Super easy.

Step 1: Clean the chard.

Step 2: Dry the chard.

Step 3: Trim off the stems, and save those for making bean salad (use to replace the celery).

Step 4: Lay in a single layer in your dehydrator, or place right on the oven racks like I did.

Step 5: Put your oven on the lowest setting (mine goes down to 150 degrees F) and let it cook for... hours. Like, three hours, or until it's dry and crumbly.

Step 6: Put it all in a food processor and whip it, whip it good, until it's all finely ground.

Step 7: Store in an airtight container.
I'll call that done!

You can add it to green smoothies, soup, dip... and other cooking things. Sorry, not super creative with the how to use it right now. BUT I'm sure that you'll think of something!

BEWARE - allllll of that chard in the first photo dehydrated down to less than a cup of chopped, dried greens. Don't add a ridiculous amount to your smoothie, a whole salad's worth comes to just a couple of teaspoons. If you add more than that you take the risk of... well, probably a lot of time on the potty.

Thursday, June 9, 2016

TEAL Raised Beds and Seedlings!

As you may have guessed - I actually stained the raised beds mid-May. The building of the beds happened on day 1, the dirt was day 2, the staining on day 4 or 5, and I planted by day 7. I'm just not so good at staying on my game with the whole posting updates thing. BUT - that means you get some cool reveals like THIS:


Instant garden!


Check out those tiny seedlings! And those pumpkins in the top photo - those were part of my egg shell starts! All of the seeds I planted did great. HELLO HOT HUMID WEATHER! Not so fun for the sweat glands, but AMAZING for germination.

You may note the fencing over the bed - that's to deter cats and critters from digging up my hard work. Once the plants are big enough I'll remove the fencing. I used the same stuff as well as some generic posts from the hardware store as a trellis for the beans. (that fencing was leftover from a play yard fence - yay reusing!)

Tuesday, June 7, 2016

TEAL Raised Beds!

one coat
WHEW it's been a busy couple of weeks! The raised beds are in, planted, and STAINED. They're gorgeous! We used a deck sprayer similar to this with a wand. Trust me - you want a wand. Trying to get a traditional paint sprayer or a can of spray paint level with the grass would have been awfully annoying.

dad going to town with the sprayer

I used a latex concrete stain recommended by the paint department, it was around $25 for a gallon. I thinned it half water half stain so it wouldn't gum up the sprayer, and we still had GREAT saturation even on one coat. The concrete blocks soaks it right up, so by the time we finished the last bed the first was dry. I wanted it to be super saturated so we did three coats total - and spent maybe half an hour with it.

I LOVE my teal raised beds! THEY'RE SO PRETTY AND TEAL OMG

(and major props to my dad for "helping" me stain the beds... and by helping I mean he totally did it for me while I pointed and took pictures)


Thursday, May 26, 2016

Raised Beds - Dirt

The raised beds have dirt! I know step two was going to be stain, but when your dad offers to fill them for you with the tractor you say yes. That saved me I don't know how many trips with the wheelbarrow. Phew!

Also pretty awesome? Max helped! Like, really helped, not "helped" like the cat helps you walk across the floor and trips you. Dad heaped the soil in the center of the bed, then Max pulled it into the holes with his rake, then I followed behind and smoothed it all out. Woo!

It'll make the staining process a little more interesting - but that's ok. I'll figure it out!


Tuesday, May 24, 2016

Concrete Block Raised Beds

What a GORGEOUS weekend, and HELLO SUMMER!

We worked on a few outside projects - including starting to assemble four concrete block raised beds. (BTW for anyone following the blog from before my hiatus - I moved, hence the need to start new garden beds)

The plan is to make them 64" square (four blocks on each end, and three blocks between), giving a four foot square interior garden space, as well as all of the holes in the blocks for planting. I got them laid out as well as some of the cardboard tucked underneath before the Sunday afternoon rain (and hunger) sent me inside. Cardboard? Yes, cardboard boxes flattened out will provide a barrier to kill the grass underneath, and by the time my plants are big enough to need to grow deeper the cardboard will have broken down enough for their roots to get through.

We're aiming to do most of our outdoor projects on a budget (per the usual) and make them pretty (again, per the usual). The concrete blocks are a great deal at $1.48 each at the local big box hardware store, and they won't break down like wood. Just over $20 for each bed frame, not including the compost. Unfortunately our compost pile is really just getting started, so we'll have to purchase compost this year. We do have a big pile of topsoil though - so there's another freebie!

After I get the cardboard tucked under I'll be staining them a dark teal. Yes, you heard that right - dark teal. :)

Thursday, May 12, 2016

Hack: Stuffing Pillows

As a treat to myself for my new place, I bought some new throw pillow covers! I've never done that before, I've always made them. Such a novel idea... Anyhow - I ran into the problem that I didn't have enough of the right size pillows to fill the new cases.

Note to self: Measure things before buying.

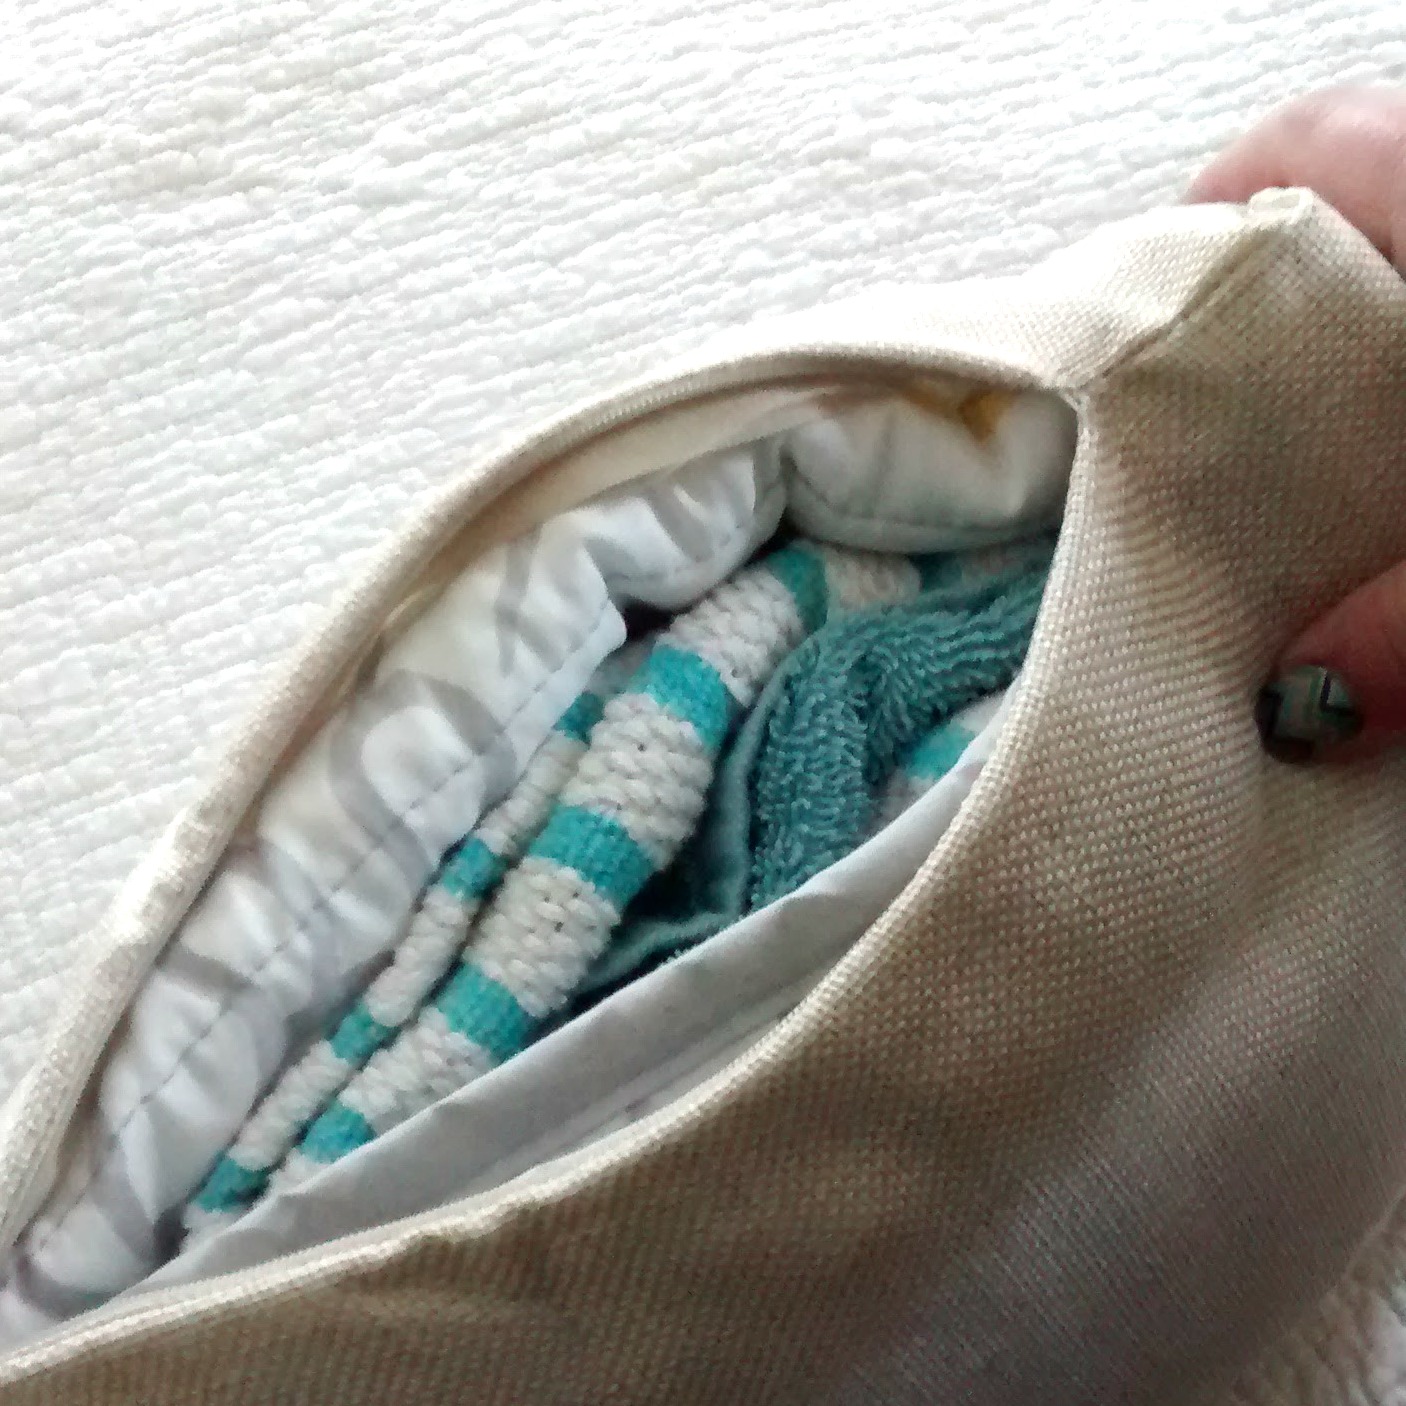
Solution: Stuff the pillows with old towels, blankets, and pillow shams!

Just take your towels etc, fold them slightly smaller than the pillow case, and try to avoid lumps. Stuff your case, and viola! Fluffy pillow.


Tuesday, May 10, 2016

Hack: Business Card Holder from Video Tape Case

Do you have a bunch of these laying around the house, collecting dust? No? Just me? Well, joke's on you because I just super-simple hacked them into business card holders. BOOM.

Start with a little video tape recording case, which is the perfect size for a business card holder. I haven't tried it with a cassette case, but that might work too. (if you ask what a cassette is, I can't help you)

Brace yourselves, this is going to get SO COMPLICATED. LOTS of steps.
Nah, I'm joking. This is super easy.

Step One: Open the case and remove the old paper (if it's still in there)


Step Two: Take the two sections apart.

Step Three: Turn the top part around.

Step Four: Carefully shove that top part into the bottom, lining the peg and holes if you can. You're just re-assembling it backwards.

Step Five: Adjust as needed so it stands up and the top part leans back slightly. Add a bit of tape on the bottom across the two pieces so they don't wiggle.

Step Six: Add your business cards and admire your amazingness.

Step Seven (optional): Make more because you are a friggen boss.

Wednesday, April 13, 2016

Eggshell Seed Starts

nice, clean shells, ready for dirt!
I'm a little bit late on starting my seeds - but better late than never!

While I was cracking eggs at the bakery this morning, I took a little extra care to crack just the very tops off (rather than down the center per the usual). I rinsed them thoroughly and let them dry in the sunshine. (we had sunshine!!!)

We get eggs by the box at work, so I trimmed the flats down to fit in a seed starter tray (you can trim regular paper egg cartons too).

After school, Max and his friend helped me label the outside of the eggs with sharpies, then we filled them up with moistened seed starter soil, and planted our seeds!

We planted Hungarian Heart tomatoes (labeled with a big T), little currant tomatoes (labeled with a little t), peas, cucumbers, yellow beans, green beans, and pumpkins.

I popped the lid on the tray, wrapped some rope lights in a towel, and set the tray on top. Now we wait!


Tuesday, April 5, 2016

Holy Macaroni, It's Been A Rollercoaster

teal hair!
Um, guys? I'm back.

WHAT???

I KNOW.

So, life has... calmed down? Not really? It's certainly changed! I've still been crafting and gardening and stuff, don't you worry. I'm a baker now! Like, as my job! How freaking cool is that? I'm also about to move back in with my parents (!!!) and I will keep you posted as we turn their 4 bedroom single family house into a 5 bedroom two-apartment house.

OH - and I dyed my hair! CHECK IT OUT

How about that for a welcome back DIY?

Always follow the directions when using hair products!

Step 1: Condition the heck out of your hair for a few weeks
Step 2: Bleach your hair - I used a 40 developer (ask an associate at a beauty supply store to help you choose the best one for your hair)
Step 3: Use toner to take down the orangey-ness
Step 4: Apply color! I used One n' Only Argon Oil Perfect Intensity color in Electric Teal, Pastel Aqua, and Emerald. I totally stole one of Max's paint brushes to apply the color. I brushed Electric Teal on the roots, Pastel Aqua on the remainder of the shaft, and Emerald for highlights/streaks. It all blended together so it looked... natural? How about it gave my hair better depth. ;)
Step 5: Maintenance, maintenance, maintenance. Every time you wash your hair, the color will fade. I try not to wash my hair more than once every three days, and I can usually make it a week before washing (my scalp is adjusting and not producing as much oil). Dry shampoo is your friend! When I do wash my hair, I use cool water, and instead of shampoo I use a toning conditioner (it's dark blue!) and mix in just a little shampoo. The mixture cleans, but doesn't really lather, and doesn't strip my hair of color. I know, I know - you're thinking you HAVE to wash your hair! Give it a shot, you might be surprised how much cleaner it feels with a good rinsing.

The best part about this? My hair looks amazing. Obv. The second best part? It didn't break the bank! The bleach, toner, and conditioner came to less than $20, and I got the hair color buy 2 get 1 free - so for less than $35 and some time and patience, I saved myself well over $100 if I had gone to the salon.

Wednesday, September 11, 2013

Super HeroGauntlets


Now, what super hero costume would be complete without gauntlets?? Exactly.

The easiest way to make them is to cut a little glovette from the sleeve of the shirt that you made the cape from - but often the sleeves are too big in circumference for little hands. So, to size it down, you can tie a seam!


Fold the fabric in half and cut a rectangle. Cut a thumb slit on the folded edge, and fringe the opposite edge. Then tie the fringe together, and you have gauntlets! I left the fringe on mine long, but Max likes his short and edgy.


Tuesday, September 10, 2013

Capes

Capes are really easy to make - just take an old shirt, cut up the sides from the bottom, angle in toward the collar, then cut around the collar and that becomes the neck hole for the cape. I snip the collar in the front and add a snap or velcro for easy release.

Usually I just use a shirt that already has a fun design on it (yes, we have a lot of capes around here!), but this time I drew on a spider web... Because Spider-Man is Max's favorite. :)


Wednesday, September 4, 2013

Dye it Black


As I've changed careers and pant size (I'm down another size, btw!), I've been reevaluating my clothing choices. While I still have my collection of business casual clothing, the majority of my time is spent in jeans, corduroys, and comfy pants. And shirts... well, let's say they need to be very washable. Spit-up and such.

Between taking old pants in to make them smaller, yard sales, and shopping the not-too-small-anymore clothes in storage, I had a nice pile to supplement my wardrobe. The only problem: they were all the wrong colors. I just don't really feel comfortable wearing colorful pants. Especially pink. So, into a black dye bath they went! (Along with a stained shirt, and a hand towel that snuck in.)

These items originally were (from the top):
Brown and blue hand towel
Light blue shirt
Olive green cords
Light olive/khaki yoga pants
Light blue lounge pants
Pink lounge pants

I love how putting all of these things in the same dye made them all different shades of gray, depending on the original color and the fiber content. The photo makes the bottom two items look almost blue, but they're much grayer in real life.

Wardrobe update: Complete. Cost: two boxes of black dye, and a quarter for the yoga pants.

Wednesday, August 14, 2013

Frugal Luxury (and a Natural Solution!) - Sugaring


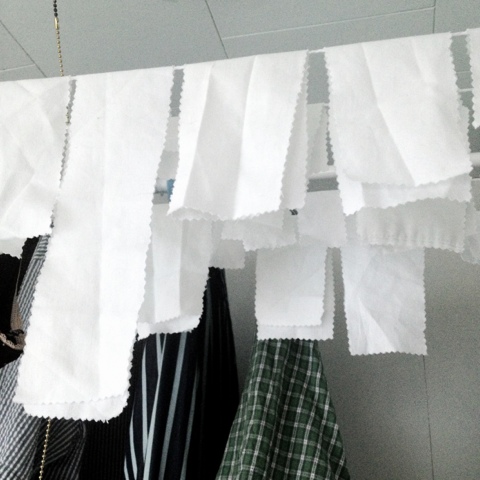
Here's a frugal luxury for you: at-home sugaring instead of waxing. I cut up an old cotton pillowcase into strips using the pinking shears, followed some handy instructions on DIY sugaring, and went to it.

For those of you who are scratching their heads - sugaring is a form or hair removal where you essentially make a carmel-like sugar mixture, spread it on your hairy areas, and rip it off with fabric strips. Just like waxing, but many prefer it over traditional wax.

Cost: a few pennies for the sugar and lemon juice. Waaaay cheaper than going to a salon, or even buying an at-home kit. Actually, it's cheaper than shaving too since you don't have to spend money on razors.

Tuesday, August 13, 2013

Grandma's Garden

My grandparents' house is one of my favorite places to be, especially outside. I know I've talked about Grandma's gardening tactics, but I thought I'd share a photo from earlier this year. Her style is a great reminder in frugal and simplistically beautiful gardening.
In the foreground is her tomato patch. She raised it a bit, just by adding old boards around the edge and back filling with some soil. As the boards wear out, she replaces them with new/old boards. Then she has her tomato supports - some great branches that she found in the woods. I think these are the same ones as last year, but as they break down she just gets some new ones. Simple as that. And she places flat rocks here and there in the raised bed so she has somewhere to rest her foot when she needs to lean in to weed.

In the background is the main vegetable bed. Instead of leaving the paths between each row to dirt and weeds, again she uses old boards that would otherwise be thrown away. They add order to the bed, repeat the wood "theme," and are easily movable when she lays it out for next year.

I have major garden envy. I really need to keep just this photo as my inspiration for next year.

Wednesday, August 7, 2013

Alternative Homes for House Plants


What to do when there are too many plants and too few pots? Improvise. I'm sure you've seen pictures of plants growing in tea tins (like mine here), but what about other containers? An old, chipped colander  Yup, I have one of those too. :) Just make sure to either line your container if it has a lot of holes or is porous (bread bags work wonderfully) and poke holes for drainage. And, of course, poke holes in that tea tin.


Monday, August 5, 2013

Yes, You Can Paint a Bike


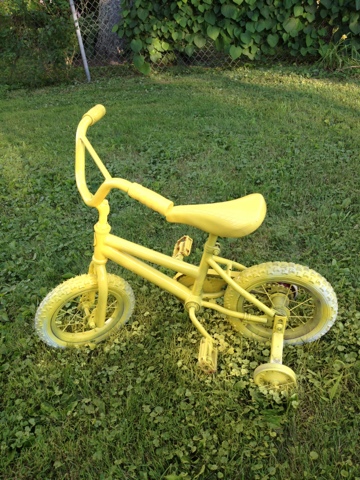
Last summer I got a bike for Max at a yard sale for $2. I was sure they left a 0 off the price, but I wasn't going to argue. It was too big for him last year, but now that he's 3 we're practicing. Max and I didn't have a problem with it being bright pink, but too many people are closed minded so I caved and painted it. 

Handy enough, I had his favorite color, orange on hand. I base painted it with yellow spray paint, then highlighted with orange. Not bad for $2 and leftover spray paint, right?

Wednesday, July 3, 2013

Tasty Iced Bevs

While perusing Pinterest, I found one of the best tips: the secret to a great brewed iced tea is a pinch of baking soda. Yup, baking soda. Add a pinch to the pitcher and it takes away that acidic bite. It also works for iced coffee. Also - freeze extra iced tea and iced coffee for ice cubes that won't dilute your beverage. You're welcome. :)

Tuesday, June 11, 2013

Baby Shampoo - Not Just For Babies

Besides doing a great job of washing Max's hair, baby shampoo is also great for washing makeup brushes, bras (and other hand wash delicates), and anything else that requires a gentle sudsing that you might be tempted to shell out big bucks to get special cleansers for. It's gentle, rinses clean, and it's cheap.

A time saving tip: wash bras while in the shower (not while wearing them of course), then flip them over the curtain rod to dry. Two minutes, tops. You're welcome. 

Tuesday, May 7, 2013