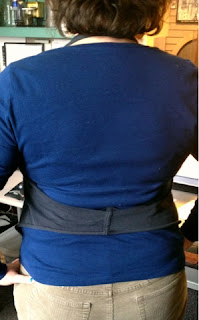
I was getting bored of Max's baby-pastel sheets (I think he was too), so I pulled out the fabric dye! (leftover from the undies project, no less!) One pastel yellow became bright orange/yellow, a pale green went chartreuse, and the dingy white changing pad is now sunshine yellow. What a nice change!
He likes the new "fun" yellow and green sheets (he calls them "fun" to differentiate from the boring sheets) so much that he requests them when it's time to change the sheets. Makes a mama happy!
Wednesday, February 27, 2013
Tuesday, February 26, 2013
Bestest Big Boy Underpants!
Tighty whities need not be boring - just get out the craft tools! I used spray bottles of dye, fabric crayons, white glue, and fabric paint.
Hint - don't be lazy like I was and throw all of the dyed undies in together without thoroughly rinsing first, they don't turn out nearly as cool. They turn out all one shade of whoops. But there's always bleach and more dye!
Monday, February 25, 2013
Pizza Tips
notice the no-topping zone for Max... |
Tip 2: Lightly coat the ball of dough in flour, then use a rolling pin to roll it out on parchment paper like a pie crust.
Tip 3: Use a pizza stone, and preheat your oven to 425 F with the stone inside. Starting pizza on a cold stone can lead to a soggy crust and an uneven doneness.
Tip 4: Carefully take the hot stone out of the oven, put it on top of the stove, transfer the assembled pizza with the parchment paper to the stone. Fold up the edges as needed so the crust doesn't hang off the edges. Then put it all back in the oven.
Tip 5: Cook for ten minutes to set the crust. Open the oven and carefully slide out the parchment paper from under the pizza. A spatula helps! Cook for another 5-7 minutes until the crust is lightly browned.
Friday, February 22, 2013
Wednesday, February 20, 2013
A Few Final DIY Additions
After purging and restocking my closet, I did a little extra something - I went through some clothes that I'd set aside and I hacked them! All of these are no-sew, and made things that I would have given or thrown away a whole new life in my wardrobe.
Last but not least, I reorganized my closet to incorporate my new wardrobe! With so much extra space I have room to hang up all of my shirts instead of folding half of them on the shelf. And the shelves actually have extra space! It's amazing. I can get dressed so much more easily when I can clearly see all of my choices instead of being overwhelmed by all of the clothes jumbled together.
So I folded, hung, arranged by color, and finger spaced the hangers.
Then Max made a fort. It was just so ridiculous I couldn't help but laugh!
- I'd been given a shirt that is one of those fake combo deals that looks like you're wearing a lightweight cardigan over a shirt, but it's really all one piece. Black cardigan? Good. With horizontal striped shirt? Not flattering. But, I liked the cardigan part of it, so I carefully cut along the seams and removed the striped "shirt" portion. Easy fix! Now I can wear the cardigan with shirts I actually like!
- I also cut up a few of the workout T's to fit a little more flatteringly, a-la this tutorial.
- AND, I turned a black T into a vest, like on here. I love this one, it was less than 5 minutes, just a few cuts, and a big impact!
- I cut the bottom off of a teal shirt and made my own infinity scarf.
Last but not least, I reorganized my closet to incorporate my new wardrobe! With so much extra space I have room to hang up all of my shirts instead of folding half of them on the shelf. And the shelves actually have extra space! It's amazing. I can get dressed so much more easily when I can clearly see all of my choices instead of being overwhelmed by all of the clothes jumbled together.
So I folded, hung, arranged by color, and finger spaced the hangers.
Then Max made a fort. It was just so ridiculous I couldn't help but laugh!
things got a little crazy in the fort... |
Tuesday, February 19, 2013
Thrift Store Finds!
BTW - one of the best times to go thrifting is the end of January to beginning of February since people are cleaning out their closets to make room for all the cool stuff they got for Christmas.
After purging my closet of everything that did not fit into my ideal, I then went to Goodwill to find some key pieces to pull together my desired look - particularly cardigan style sweaters with chunky/draped collars, long sleeve shirts, and neutral flats. And did I ever find some! I got four new sweaters - two brown, one black, and one blue - and they're all so pretty, and with great texture! Then those shoes - totally unworn, and comfy. I got several shirts, mostly long sleeved ones to wear to work, as well as a few gym shirts (since I've recently started going to the gym again). Two giant bags came out to $65 - waaaay less than retail.
Overall, a total success. All of the items I purchased I've worn, and they bring new life to my old wardrobe.
"new" shirt and sweater (excuse the weird exposure & angle...) |
Monday, February 18, 2013
Wardrobe Redo
I was going through my "My Style" Pinterest board the other day, and had a duh moment. I really like a certain type of clothing. And a certain color group. Um, yeah. To the point of obsession. And I had no clue. (click on images for source)
I've talked before about having a mommy uniform, and I've talked to my coworkers about how it would be awesome if we could just wear the same thing every day (I'd wear a black long-sleeved T and jeans), but I guess it just hadn't clicked in my brain that I could actually do that for reals.
So I used my board for inspiration, and decided to purge my closet. Nothing would stay that:
1: Did not fit correctly.
2: Was any color other than blue, green, black, brown, or gray (I look awful in white, and whenever I wear purple people ask me if I'm tired).
3: I hadn't worn in a long time.
4: I didn't really want to keep (guilt items).
With those rules, and my inspiration photos to guide me, I purged. It was painful and freeing all at the same time. Though I weed out my closest frequently, I have never purged like this. I got rid of a large garbage bag of clothes - over half of my wardrobe. My mom and a few friends were stoked to get the rejects, all of the items were in great condition, they just didn't fall into my rules.
With the great purge done, it was on to phase 2: incorporating new items that also follow the rules!
Friday, February 15, 2013
Wednesday, February 13, 2013
Chair Seat - the Covering
Fair warning: this might seem simple. Cuz it is.
Make sure you have the right materials and tools handy, and it'll go pretty fast. You'll need quilt batting, fabric (I used a fat quarter), staple gun, pliers, and scissors. Glue optional.
Cut out thee pieces of batting - one piece the same size as the seat, one piece a few inches smaller, then a third a few inches smaller than the first. Stack them on top of the seat with the largest piece on top.
Now place your fabric on the very top, making sure that there are at least three inches of overhang on each side.
The tricky part - flip the whole thing over without disturbing the layers. A bit of glue or spray adhesive could help, but for such a small project it wasn't worth the stickiness.
Starting at the center of each side, staple down the fabric, pulling gently but firmly to keep the fabric taut. Continue stapling around the edges, using the pliers to remove any whoopsie staples.
Secure the corners last, pulling the fabric in from both sides and stapling at least twice. Trim the fabric at the corners, and edges if needed.
Then flip it over - we're done! (If you really wanted to you could put another rectangle of fabric down to cover the raw edges, but who looks down there anyhow?)
Done! |
Tuesday, February 12, 2013
Chair Seat
This had to be one of the largest "time to complete task versus time spent avoiding task ratios" I've had. The seat of my chair broke a few years ago, and it took less than half an hour total to fix. Years:minutes... I'm not doing the math. But it's done now!
It's an easy fix, the style of chair just needs a floating seat that drops down into the frame. All I had to do was suck it up and get out the saw. The little battery operated saw that I keep in the cabinets near my craft area. Not like I had to even go outside and walk across the driveway to the garage for this one. Seriously, I have no idea why I've been putting this off for so long.
So I got out the saw, made three cuts on two pieces of wood (aka old pieces of bookshelf left over from Max's shelves), and glued them together. Done in 15 minutes.
Well, almost done. It still needs covering. Stay tuned!
Monday, February 11, 2013
Colander Planter
I swear, colander has got to be one of the weirdest words to spell.
ANYhow.
I ran out of pots the other day when doing some indoor gardening, so I recruited a small colander that was starting to chip. I suspended it from the kitchen ceiling with a few cup hooks and yarn (conveniently located over the trash can for any drips). It looks super cute!
ANYhow.
I ran out of pots the other day when doing some indoor gardening, so I recruited a small colander that was starting to chip. I suspended it from the kitchen ceiling with a few cup hooks and yarn (conveniently located over the trash can for any drips). It looks super cute!
Friday, February 8, 2013
Wednesday, February 6, 2013
Initial Cookies
My cousin's son, T, turned 3 recently. I asked what he wanted for his birthday, but she requested no more toys, and he has plenty of clothes, and mostly he plays with the vacuum... So cash it was! But, cash is so boring when you're 3, so I made some T cookies to go with his card. :) The cookies are regular sugar cookies with some blue sugar crystals on top. Then I made simple syrup (equal parts sugar and water, boiled to liquid, and cooled), added blue food coloring, then painted the letters on with a paintbrush. Easy and tasty!
Tuesday, February 5, 2013
Frugal Luxuries: Door Draft Stopper
A quick fix for your drafty doors - roll an old towel up from either end, tie some string around it, and slide under the door. Done - and you can use the towel again in the summer since you didn't cut it!
Monday, February 4, 2013
Ground Beef Made Easy
You can totally cook ground beef in the crock pot. Yup.
Go ahead and buy that giant thing of ground beef, plop it in your crock pot, and turn it on low for 6-8 hours or until cooked medium well in the center (you'll finish browning it when you go to use it in your meal). The grease and moisture will mostly cook out, surrounding the ground beef in liquid that you can drain off, leaving you with more or less a roast of lean ground beef. Break it up or slice it and put it in baggies or freezer-friendly containers and freeze.
My shepherd's pie took all of 15 minutes tonight! I browned up the thawed ground beef in a big pan (and didn't have to drain it!), tossed some frozen corn on top right in the pan, covered it with creamed corn and instant mashed potatoes, heated it through, and - DONE!